Essential WordPress Security Guide for 2026
Let’s be honest: nobody wakes up excited to check their WordPress security settings. But after watching a handful of our small business clients face malware cleanups, SEO spam injections, and the special kind of panic that comes from seeing “Your site has been hacked” messages on a Monday morning, we’ve learned that security isn’t about paranoia—it’s about making sure your website actually works when you need it. The 2026 threat landscape has ramped up pressure on small business sites, with over 11,000 new vulnerabilities discovered in the WordPress ecosystem during 2025 alone, a 42% increase from the previous year and automated attacks now launching within five hours of a vulnerability being publicly disclosed. If your update schedule amounts to “whenever we remember,” your site is essentially sitting in traffic with its doors unlocked and the keys in the ignition.
Security, stripped of the jargon, means reducing the risk that something bad happens to your site. That something could be malware that redirects your customers to sketchy pharmacies, injected spam links that tank your Google rankings, stolen customer data that lands you in regulatory trouble, or just downtime that kills your lead generation during your busiest season. For small businesses, the consequences are rarely abstract. A hacked site means lost revenue, wasted time, and damage to your reputation. When we talk about WordPress security, we’re really talking about putting layers of protection in place so that if one layer fails—and something always fails eventually—the others catch the problem before it escalates.
Table of Content
What “Security” Actually Means for a Small Business Website
Security, stripped of the jargon, means reducing the risk that something bad happens to your site. That something could be malware that redirects your customers to sketchy pharmacies, injected spam links that tank your Google rankings, stolen customer data that lands you in regulatory trouble, or just downtime that kills your lead generation during your busiest season. For small businesses, the consequences are rarely abstract. A hacked site means lost revenue, wasted time, and damage to your reputation. When we talk about WordPress security, we’re really talking about putting layers of protection in place so that if one layer fails, and something always fails eventually, the others catch the problem before it escalates.
The practical goal for most small businesses isn’t to build a digital fortress that stops nation-state hackers. It’s to make your site harder to compromise than the next site on the block, because automated attacks move fast and they move on to easier targets when they hit resistance. Think of it like locking your car: it won’t stop a professional thief with the right tools, but it eliminates the casual opportunist trying door handles in a parking lot. WordPress security operates on the same principle. Strong passwords, two-factor authentication, updated plugins, proper backups, and basic hardening steps won’t make you unhackable, but they will make you a low-priority target for the automated bots that account for the vast majority of WordPress attacks.
The 2026 Threat Model: Where Hacks Really Come From
The attack surface for WordPress sites breaks down into three main categories, and understanding where the risk actually concentrates helps you focus your energy. First, compromised accounts remain the most common entry point for successful breaches. Attackers guess weak passwords, reuse credentials stolen from other breaches, or exploit shared logins that haven’t been rotated in years. Once they have valid admin credentials, all your other security measures become irrelevant because they’re logged in as you. Second, security vulnerabilities in plugins and themes create openings for automated exploitation. With 91% of WordPress vulnerabilities originating in plugins rather than core, every plugin you install extends your attack surface. Third, human error and misconfiguration like leaving file permissions wide open, disabling security features for convenience, or never testing backups—create gaps that attackers can exploit.
Outdated Components and Injected Admins
The data from 2025 tells a clear story. Out of 11,334 new vulnerabilities discovered in the WordPress ecosystem, 91% were found in plugins, 9% in themes, and only six vulnerabilities appeared in WordPress core itself. Even better, those six core vulnerabilities were all classified as low priority and patched rapidly. This distribution is both encouraging and sobering: WordPress core is rock solid, but the ecosystem of third-party extensions that make WordPress useful is where the risk concentrates. Attackers know this and have industrialized the exploitation process. Security research from Patchstack shows that when a vulnerability is disclosed publicly, automated exploitation campaigns begin within five hours on average, with 46% of disclosed vulnerabilities remaining unpatched at the time attackers learn about them.
Injected admin accounts represent one of the sneakier tactics attackers use once they gain initial access through a vulnerability. Instead of immediately defacing your site or injecting obvious malware, sophisticated attackers create a hidden administrator account buried in your user list, often with a username that looks legitimate like “wpservices” or “support-admin.” This backdoor account allows them to return even after you think you’ve cleaned up the initial compromise. The pattern we see most often involves outdated plugins creating the initial vulnerability, automated attacks exploiting that vulnerability within days or hours of public disclosure, attackers creating hidden admin accounts to maintain access, and then the actual malware or spam injection happening weeks later when the site owner has forgotten about the initial incident.
The Checklist: Priority Order
We’ve structured this checklist in priority order so you can tackle the highest-impact items first. If you only have 60 minutes, start at the top. If you can invest 90 minutes, you’ll get through the core hardening steps. The full checklist, implemented methodically over a few sessions, creates layered protection that significantly reduces your risk profile. None of these steps requires deep technical expertise, though a few benefit from checking with your hosting provider or web developer if you’re unsure about your specific environment.
Hosting and HTTPS Baseline
Your hosting environment forms the foundation of everything else you’ll build. Shared hosting that costs $3 per month might work for a hobby blog, but business-critical sites warrant hosting that includes security features like malware scanning, firewalls, and automatic backups. Managed WordPress hosts like WP Engine, Kinsta, or even mid-tier providers like SiteGround provide infrastructure security that shared hosting simply can’t match. They isolate your site from other customers, keep server software updated, and monitor for suspicious activity at the server level. For Canadian businesses specifically, hosting your WordPress site in Canada can simplify compliance with privacy regulations and provide faster loading times for your primarily Canadian audience.
HTTPS encryption, the padlock icon in your browser’s address bar, needs to be configured and working correctly. Every page on your site should load over HTTPS, not just the login page or checkout. Most hosting providers now offer free SSL certificates through Let’s Encrypt, making cost a non-issue. The security benefit is straightforward: HTTPS encrypts data transmitted between your visitors’ browsers and your server, preventing attackers on public WiFi networks from intercepting login credentials or sensitive form submissions. Beyond security, Google treats HTTPS as a ranking factor and browsers display scary warnings for non-HTTPS sites, so there’s literally no reason to skip this step. Log into your hosting control panel, look for SSL certificate options, install the free certificate, then use a plugin like Really Simple SSL to force all traffic to HTTPS and fix any mixed-content warnings.
Updates + Plugin Governance
Plugin governance sounds bureaucratic, but it just means being intentional about what you install and maintaining what you keep. Every plugin adds code complexity and potential vulnerabilities, so the first rule is to remove any plugins you’re not actively using. Log into your WordPress dashboard, navigate to the Plugins section, and deactivate then delete anything that’s been sitting dormant. That social sharing plugin you installed two years ago and forgot about? Gone. That slider plugin you replaced with a better one? Delete it. The SEO plugin you tried before switching to your current tool? Remove it. Each eliminated plugin reduces your attack surface and slightly improves your site’s performance as a bonus.
For the plugins you keep, establish a weekly update routine. Pick a specific day, Saturday afternoons work well for us, and spend 15 minutes checking for updates across your site. WordPress core updates, plugin updates, and theme updates should all be applied promptly, with one important caveat: if you’re running an ecommerce site or have complex custom functionality, test updates on a staging copy of your site first to catch any compatibility issues before they hit your live site. Most managed WordPress hosts include free staging environments, and plugins like WP Staging can create staging sites on standard hosting. The five-hour window between vulnerability disclosure and active exploitation means that delaying updates by weeks or months leaves you unnecessarily exposed to automated attacks that specifically target known vulnerabilities.
When evaluating whether to install a new plugin, look at a few key indicators of the developer’s commitment to security and maintenance. Check when the plugin was last updated anything unchanged for more than six months raises concerns about whether the developer is still actively maintaining it. Read recent reviews, particularly one-star reviews, to see if users report security issues, conflicts, or lack of support responses. Verify the number of active installations; while popularity isn’t a guarantee of security, it does mean more eyes are on the code and vulnerabilities are more likely to be reported and fixed. Finally, check whether the developer has established relationships with security research firms like Patchstack or Wordfence, which indicates they take vulnerability disclosure seriously.
Logins: 2FA, Least Privilege, Brute Force Protection
Login security starts with eliminating the most common attack vector: weak passwords and default usernames. If your WordPress admin username is “admin,” change it immediately. Attackers know that “admin” is the default username WordPress used to create during installation, so every brute force attack tries it first. Create a new administrator account with a unique username that isn’t your business name or anything easily guessable, then delete the old “admin” account. For passwords, 16 characters minimum mixing uppercase, lowercase, numbers, and symbols should be your baseline. Better yet, use a password manager like 1Password or Bitwarden to generate and store truly random passwords that no human would ever remember or guess.
Two-factor authentication (2FA) represents one of the highest-impact security measures you can implement, particularly given how simple it is to set up. 2FA requires both your password and a time-limited code from your phone to log in, which means that even if an attacker steals or guesses your password, they can’t access your site without also having your phone. Plugins like Wordfence, Solid Security, or miniOrange add 2FA functionality to WordPress. The setup process takes about five minutes: install the plugin, enable 2FA in the settings, scan the QR code with an authenticator app like Google Authenticator or Authy, and save the backup codes somewhere secure in case you lose access to your phone. Once configured, 2FA adds about 15 seconds to your login process but eliminates an enormous category of credential-based attacks.
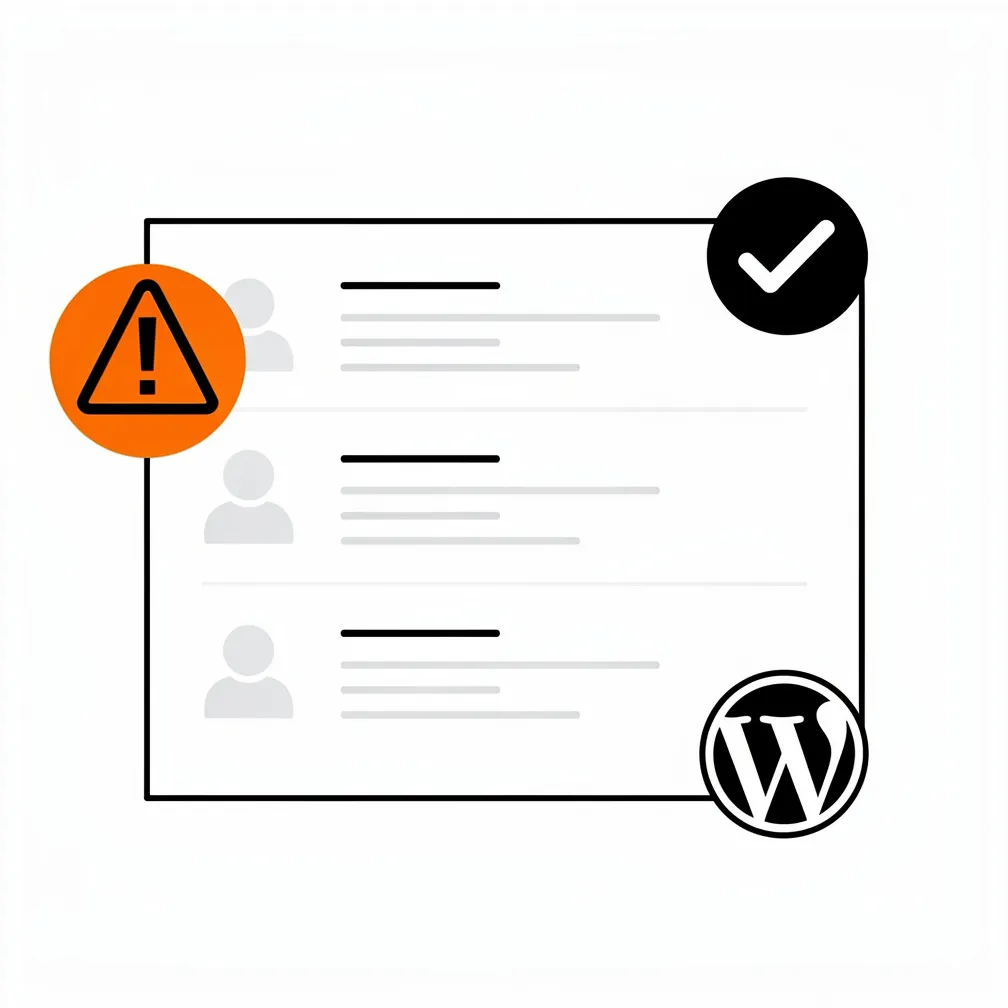
User roles and permissions deserve attention on any site where multiple people have login access. WordPress provides five default roles with different permission levels, and following the principle of least privilege means giving each user only the access they actually need. Your freelance writer doesn’t need Administrator access that lets them install plugins and delete your entire site; they need Author access that lets them write and publish posts. Your client who occasionally updates their About page doesn’t need Administrator access; they need Editor access to modify pages and posts. Review your user list quarterly, verify that role assignments match actual responsibilities, and delete accounts for anyone who no longer works with you. Limiting administrator accounts to two or three people who genuinely need full site access reduces the number of credentials that, if compromised, could destroy your site.
Brute force protection limits how many times someone can attempt to log in with wrong credentials before getting locked out. Without protection, automated attacks can try thousands of username and password combinations, eventually guessing weak credentials. With protection enabled, after five failed login attempts from the same IP address, that attacker gets locked out for 30 minutes, making brute force attacks impractical. Most WordPress security plugins include brute force protection as a standard feature. Enable it, configure it to lock out after 3-5 failed attempts, and check your security logs occasionally to see how many attacks your site is actually blocking—the numbers might surprise you.
Hardening Steps: File Editing, Permissions, Config Protection
WordPress hardening refers to configuration changes that remove unnecessary functionality and lock down file access. One of the most effective hardening steps is disabling the file editor that lets you modify theme and plugin code directly from the WordPress dashboard. While convenient for quick fixes, this editor also means that anyone who gains admin access to your site including attackers who compromise an admin account can inject malicious code directly into your theme files. Disable it by adding a single line to your wp-config.php file: define(‘DISALLOW_FILE_EDIT’, true);. This prevents code editing through the dashboard while still allowing you to make changes through FTP or your hosting file manager when actually needed.
File permissions control who can read, write, or execute files on your server. Correct permissions follow a specific pattern: directories should be set to 755 (readable and executable by everyone, writable only by the owner), most files should be 644 (readable by everyone, writable only by the owner), and your wp-config.php file should be 440 or 600 (readable only by the owner and server, not writable by the web server). Many shared hosting environments default to overly permissive settings like 777 that allow any process on the server to modify your files. Check with your hosting provider about correct file permissions for their specific environment, or use your FTP client to set permissions according to the WordPress hardening documentation.
Your wp-config.php file contains database credentials and security keys that should never be publicly accessible. Make sure this file lives in your site’s root directory with restrictive file permissions. Additionally, consider moving your wp-config.php file one directory level above your public web root, which WordPress supports and which prevents direct web access even if your server is misconfigured. Protect your .htaccess file (on Apache servers) or equivalent configuration files by setting appropriate permissions and configuring your server to deny direct access to configuration files. These hardening steps take 10-15 minutes to implement and create barriers that stop many automated attacks in their tracks.
Firewall and WAF Layer
A web application firewall (WAF) sits between your site and the internet, filtering malicious traffic before it ever reaches WordPress. Think of it as a security guard checking IDs at the door, suspicious requests get blocked before they can attempt to exploit vulnerabilities in your plugins or themes. You can implement a WAF at two levels: application-level firewalls that run as WordPress plugins, and network-level firewalls that operate through your hosting provider or a service like Cloudflare. Application-level firewalls like Wordfence or Solid Security are easier to set up but add server load. Network-level firewalls like Cloudflare’s WAF or Sucuri’s firewall operate in the cloud before traffic reaches your server, providing better performance but requiring DNS changes.
For most small business sites, we recommend starting with Cloudflare’s free plan, which provides basic DDoS protection and SSL/TLS encryption, then adding an application-level WordPress security plugin like Wordfence for malware scanning and login protection. This layered approach catches different types of threats at different levels. Cloudflare blocks obvious attacks and malicious IP addresses at the network edge, while Wordfence monitors WordPress-specific threats like vulnerable plugins and suspicious file modifications. The combined setup takes about 30 minutes: create a Cloudflare account, point your domain’s nameservers to Cloudflare, enable the firewall and SSL settings, then install and configure Wordfence in WordPress. Both services offer free tiers that provide substantial protection, with paid upgrades available if you need more advanced features.
Backups and Recovery: Don’t Skip This
We’ve seen too many small businesses learn about the importance of backups the hard way. Your site gets hacked, you need to restore from backup, you discover the backup plugin wasn’t actually working, and now you’re rebuilding from scratch. Backups are your insurance policy—the last line of defense when everything else fails. The critical thing to understand is that backups are only valuable if they’re automated, stored offsite, tested regularly, and can actually be restored when you need them. A backup that lives on the same server as your hacked site is useless if the attacker deletes everything. A backup you’ve never tested might be corrupted or incomplete, revealing itself as broken only when you desperately need it.
The 3-2-1 Rule and How to Implement It on WordPress
The backup industry’s gold standard is the 3-2-1 rule: maintain three copies of your data, store them on two different types of media, and keep one copy offsite. For WordPress sites, this translates to one live site (your production site), one backup on your hosting server or a different storage medium, and one backup stored in the cloud or at a different physical location. Most WordPress backup plugins make implementing this rule straightforward. Our detailed guide on WordPress backup strategy walks through the specifics, but the essential setup involves installing a backup plugin like UpdraftPlus or BackupBuddy, configuring automatic daily or weekly backups depending on how often your content changes, and connecting the plugin to cloud storage like Google Drive, Dropbox, or Amazon S3 for offsite storage.
The backup frequency should match your content update frequency. If you run an ecommerce site with dozens of orders daily, you need daily backups at minimum. If you publish blog posts weekly and rarely change other content, weekly backups are probably sufficient. The key is to automate the process so backups happen without you remembering to trigger them manually. Configure your backup plugin to retain multiple backup versions, not just the most recent backup, because sometimes you don’t discover a compromise for days or weeks and need to restore to a point before the attack occurred. Most backup plugins let you keep the last 7-10 backups, automatically deleting older versions to manage storage space.
Testing your backups might be the most frequently skipped step in the entire backup process, but it’s arguably the most important. At least quarterly, actually restore a backup to verify the process works. This doesn’t mean restoring over your live site; instead, restore to a staging environment or local development site to confirm the backup is complete and the restoration process functions correctly. During this test, make sure your restoration includes both the database and files, verify that images display correctly, check that forms work, and confirm that no errors appear. A backup you’ve never tested is a backup you can’t trust, and discovering during an emergency that your restoration process doesn’t work is a nightmare you want to avoid.
If You Get Hacked: A Simple Incident Response Plan
Let’s assume the worst: you log into your site and see injected spam in your posts, or Google shows a “This site may be hacked” warning, or your hosting provider has sent an urgent email about malware. Your first instinct might be panic, but having a simple response plan prepared in advance makes the situation manageable. The response framework follows four phases: contain the threat to prevent further damage, clean the infected files to remove malware, restore service to get your site working again, and review what happened to prevent recurrence. Small business WordPress sites can typically be cleaned and restored within a few hours if you act methodically rather than randomly deleting files hoping to fix things.
Contain, Clean, Restore, Review
Containment means stopping the attack from spreading or continuing. If you have access to your hosting control panel, take your site offline immediately by putting up a maintenance mode page or temporarily password-protecting the entire site. This prevents visitors from encountering malware and stops attackers from continuing to exploit vulnerabilities. Change all passwords immediately, starting with your WordPress admin password, database password, hosting control panel password, and FTP passwords. If you can identify specific malicious files or scripts that are currently executing, delete or rename them to stop the active attack. Notify your hosting provider about the compromise because they may have server-level logs that help identify how the attacker gained access.
Cleaning involves removing malware and repairing damage, which typically requires help from security plugins or security professionals. Install a security plugin like Wordfence or Sucuri if you don’t already have one, then run a comprehensive malware scan. The scan will identify injected code in core files, suspicious files that shouldn’t exist, and malware in themes and plugins. For simple cases, security plugins can automatically clean detected malware. For complex infections, particularly when attackers have created backdoor accounts, injected database code, or modified core files extensively, you may need professional help. We’ve handled dozens of malware cleanups over the years, and while many are straightforward, some require careful forensic work to ensure all traces of the infection are removed.
Restoration depends on whether you can successfully clean the infection or need to restore from backup. If cleaning works, update WordPress core, all plugins, and themes immediately because the infection likely exploited a vulnerability that still exists until you update. If cleaning doesn’t work or the infection is too extensive, restore from your most recent clean backup. Here’s where that backup testing pays off: you already know the restoration process works. After restoring, again update everything immediately because restoring from backup takes you back to the vulnerable state that enabled the attack in the first place. One critical mistake we see repeatedly is restoring a backup without updating, which just puts the site back in a vulnerable state ready to be hacked again through the same vulnerability. Check our guide on solving WordPress errors if you encounter unexpected issues after restoration.
Review involves understanding what happened and implementing measures to prevent recurrence. Check your WordPress admin user list for unauthorized admin accounts and delete them. Review your hosting access logs if available to understand when the attack occurred and how the attacker gained access. If a specific plugin vulnerability was exploited, make sure that plugin is either updated to a secure version or removed entirely and replaced with a better-maintained alternative. Document what happened, what you did to fix it, and what you’re changing to prevent it from happening again. This documentation serves as both a learning tool and a reference if you face future incidents.
Ongoing Monitoring and Maintenance Cadence
Security isn’t a one-time project you complete and forget about; it’s an ongoing process that requires regular attention. The good news is that once you’ve implemented the baseline security measures outlined above, maintaining security becomes a matter of routine maintenance rather than major projects. The maintenance cadence we recommend for small business sites involves weekly update checks and monthly security reviews, with quarterly comprehensive audits that dig deeper into your site’s security posture. This schedule balances the need for staying current against the reality that small business owners have limited time to spend on website maintenance.
Weekly update checks should take 10-15 minutes. Log into your WordPress dashboard, check for available updates to core, plugins, and themes, and apply them. Review any security alerts from your security plugin, check the activity log for suspicious login attempts or file modifications, and verify your site is loading correctly. If you’re managing multiple sites, WordPress management tools like ManageWP or Jetpack can aggregate this information across all your sites, showing pending updates and security alerts in one place. This weekly rhythm ensures that security patches are applied within days rather than weeks or months, dramatically reducing your exposure window.
Monthly security reviews go a bit deeper than weekly updates. Run a full malware scan using your security plugin to check for infections you might have missed. Review your user account list and verify all accounts still need access with their current permission levels. Check your backup logs to confirm backups are completing successfully and aren’t generating errors. Review your site’s uptime and performance metrics to catch any degradation that might indicate hidden problems. If your site handles sensitive data, review any privacy and compliance documentation to confirm you’re still meeting regulatory requirements. Understanding WordPress data privacy compliance becomes particularly important if you serve Canadian or international audiences.
Quarterly comprehensive audits involve stepping back to assess the big picture. Test your backup restoration process by actually restoring a backup to a staging environment. Review your complete plugin inventory and assess whether each plugin is still necessary, still maintained by its developer, and still the best option for its purpose. Check your site’s PHP version and server configuration to ensure you’re running current software versions. Review any security incidents or suspicious activity from the past quarter and identify patterns that might indicate deeper issues. Assess whether your hosting environment still meets your needs or whether it’s time to upgrade to a more robust option. This quarterly rhythm catches issues that might not be visible in weekly or monthly checks and ensures your security posture evolves as your site and the threat landscape change.
The WordPress security landscape demands more attention than ever before, but the payoff for implementing systematic security practices is significant: fewer emergencies, less downtime, better SEO results because Google rewards secure sites, and peace of mind knowing your digital presence is protected. At WP Expert, we’ve built security maintenance into all of our WordPress care plans specifically because we’ve seen how much time and money our clients save when security is handled proactively rather than reactively. Whether you implement these measures yourself or partner with a WordPress maintenance provider, the essential insight is that WordPress security is entirely manageable for small businesses when approached systematically rather than hoping problems won’t find you.
Frequently Asked Questions
Why are most WordPress vulnerabilities found in plugins rather than core?
Hey, if you’re running a small business site, this hits home: 91% of the 11,334 new vulnerabilities in 2025 came from plugins, with just 6 low-priority ones in WordPress core that got patched fast. Plugins extend your site’s power but also its risks, and attackers exploit them automatically within 5 hours of disclosure. Ditch unused ones, update weekly, and pick actively maintained plugins to shrink your attack surface without losing functionality.
How do I spot and stop hidden admin accounts created by hackers?
That sneaky “wpservices” or “support-admin” account is a classic backdoor, attackers slip it in after exploiting a plugin vulnaribility, letting them return later for spam or malware. Check your WordPress user list regularly, delete anything suspicious, and pair it with 2FA and brute-force locks from plugins like Wordfence. It’s a quick scan that saves you weeks of cleanup pain down the line.
What’s the easiest way to set up backups that actually work for my site?
Nobody wants to rebuild after a hack, right? Follow the 3-2-1 rule: 3 copies (live site, server backup, cloud), 2 media types, 1 offsite. Use UpdraftPlus to automate daily/weekly backups to Google Drive or S3, keep 7-10 versions, and test restores quarterly on staging. Skip this, and a “working” backup turns into a nightmare when you need it most.
Should I use Cloudflare or a WordPress plugin for firewall protection?
Feeling overwhelmed by threats? Start with Cloudflare’s free plan for network-level blocking of bad traffic and DDoS, then layer on Wordfence for WordPress-specific scans and login guards: it takes 30 minutes total. This combo catches automated bots at the door and plugin exploits inside, without slowing your site, perfect for small biz budgets.
What’s the first thing to do if my site gets hacked on a Monday morning?
Panic mode? Take a breath: first, take the site offline with maintenance mode or .htaccess IP blocks to stop spread, change all passwords (WP, hosting, FTP), and scan with Wordfence or Sucuri. Then clean or restore from tested backups, update everything, and hunt rogue admins. Pros handle tough cases, but this plan gets most sites back fast without lost revenue.